Phidler
Design photonic integrated circuits visually. Place, route, simulate, and export GDS, without writing a line of Python.
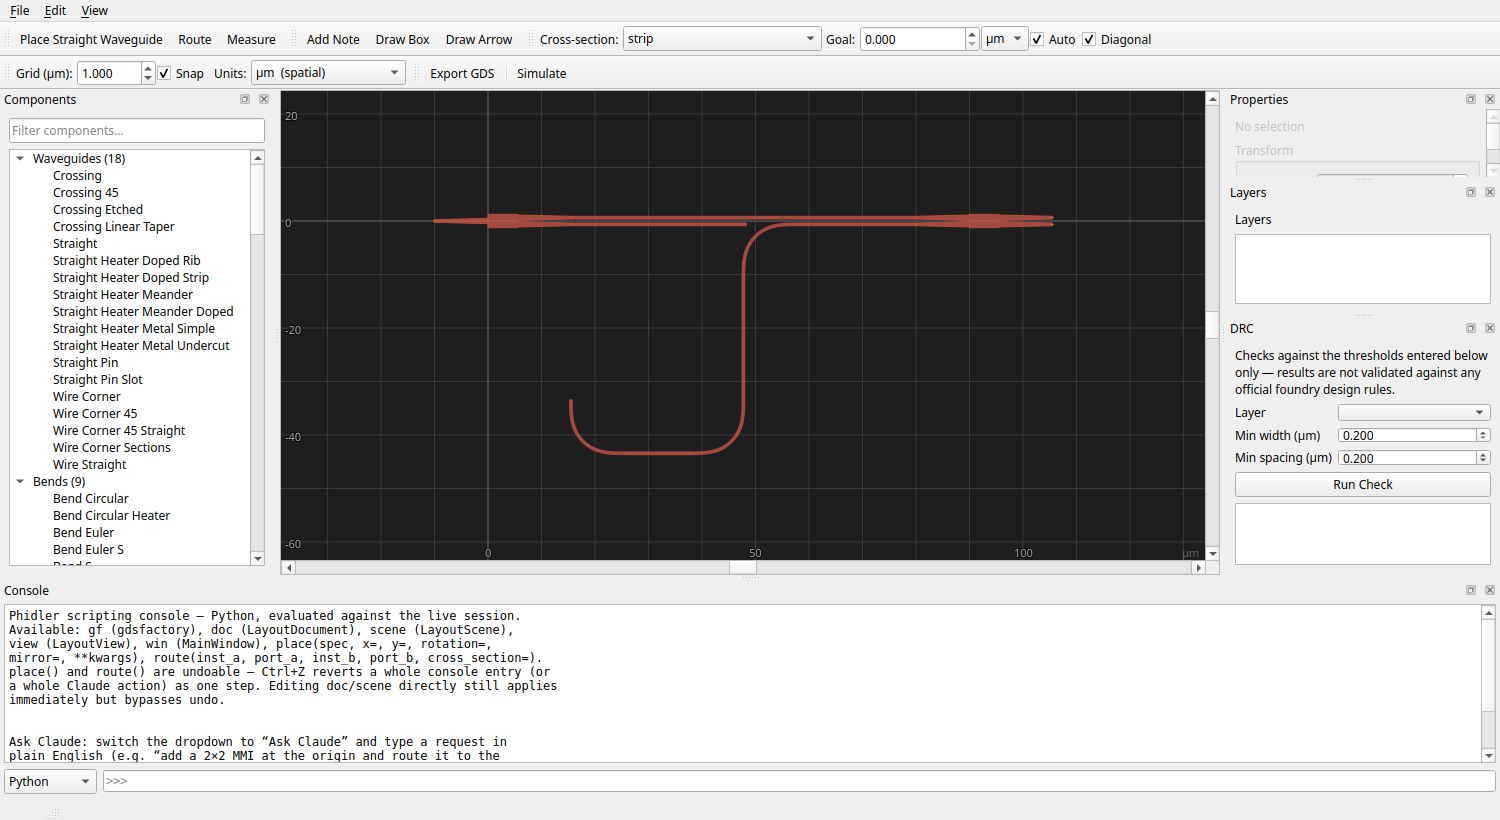
Phidler is a desktop CAD application for photonic integrated circuit (PIC) layout, built on gdsfactory. It puts a real interactive canvas in front of gdsfactory's component library. You drag components from a searchable palette, route between ports with the mouse, length-match delay lines automatically, check basic design rules, watch light propagate through your layout with a built-in FDTD engine, and export a foundry-ready GDS. It all happens in one window.
Why Phidler?
- Visual, not scripted. gdsfactory is powerful but Python-first. Phidler gives you the same PDK components on a click-and-drag canvas, so laying out a circuit doesn't mean writing and re-running a script.
- Routing that does the math. Draw a waveguide between two ports, set a target length, and Phidler inserts an adiabatic meander to hit it. That's the delay matching an interferometer or a true-time-delay line needs, done for you.
- See the light. A built-in FDTD simulator shows the guided mode profile and animates a pulse propagating through your actual layout. Run it locally, on a GPU (NVIDIA or AMD), or offloaded to a remote box.
- One window, whole flow. Palette → canvas → routing → DRC → simulation → GDS export, plus a live scripting console for when you do want to drop into gdsfactory. No round-trips between tools.
- Or just ask. Have the Claude Code CLI? Switch the console to "Ask Claude" and describe the circuit you want in plain English. It places and routes on the live canvas through the same session you do, and it reads what you've got selected, so you see every move it makes.
- It's still gdsfactory underneath. Every component is a real gdsfactory factory, and the export is a real GDSII your foundry/PDK toolchain already understands.
New here? Take the Feature Tour to see what it looks like, then work through the MZI Tutorial to build a real circuit end-to-end in about fifteen minutes.
Installation
Linux — AppImage (no install)
The quickest way to run Phidler on Linux is the AppImage: a single self-contained file that bundles Python, the app, and the full FDTD simulation stack (photonfdtd + numba + matplotlib). Nothing to install, no Python needed.
Grab the latest nightly release, then:
chmod +x Phidler-x86_64.AppImage
./Phidler-x86_64.AppImage
Because the simulation packages are bundled, FDTD works out of the box, with
no separate photonfdtd install. (A fresh AppImage is built and published every
night from main. It needs a reasonably recent glibc, so any current desktop
distro is fine.)
From source
Requires Python 3.10+.
Linux
git clone https://github.com/ngpaladi/phidler.git
cd phidler
python3 -m venv .venv
source .venv/bin/activate
pip install -e ".[dev]"
macOS
Requires Python 3.10+ from python.org
or Homebrew (brew install python@3.12).
git clone https://github.com/ngpaladi/phidler.git
cd phidler
python3 -m venv .venv
source .venv/bin/activate
pip install -e ".[dev]"
Windows
Requires Python 3.10+ from python.org. Run in PowerShell or Command Prompt:
git clone https://github.com/ngpaladi/phidler.git
cd phidler
python -m venv .venv
.venv\Scripts\activate
pip install -e ".[dev]"
Add docs to the extras (pip install -e ".[dev,docs]") to also build
this documentation site.
Running it
Linux / macOS:
./run.sh
On first run, run.sh creates the .venv and installs Phidler for you if it
isn't there yet, so the manual venv steps above are optional if you launch
this way.
Windows: run.sh is bash-only, so launch directly instead:
python -m phidler
Both show the Project Settings dialog first, where you pick a material platform before placing components (see Project Settings).
On Linux, if your system Qt6 conflicts with PySide6's bundled Qt6 (an
undefined symbol crash on import), run.sh already handles this. See
Development: environment notes for
details.
Next steps
- Feature Tour: a screenshot walkthrough of everything Phidler can do, from placement to FDTD.
- MZI Tutorial: build a Mach–Zehnder interferometer step by step, with routing, length matching, mode solving, DRC, and export.
- User Guide: the complete reference for placing, editing, routing, layers, DRC, save/export, scripting, and FDTD.
- Keyboard Shortcuts: the full key and menu reference.
- FAQ & Troubleshooting: answers to common questions and fixes for common snags.
- Development: code layout, test suite, and what's verified vs. what still needs manual checking.